Monday, October 31, 2011

Painting: Annyssa Ryvaal WIP (3)


Here is part 3 of the series for Annyssa.  This model has definitely consumed more of my time than others because it is more complex.  She has belts, metal and leather and wood and hair etc...

To do the base I used my "Dead Earth" technique I normally use, which I talk about in detail here.  But to summarize, I base in any acrylic black > Grave Yard earth > Desert Yellow > Bone White > Skull White.  Except for the base color I mainly dry brush all these colors so that they contrast on the material like dirt or rock.


I took a couple of additional steps to ensure that the cork material would end up looking closer to a slab of stone than earth so I added a dark grey > light grey > skull white dry brush step.


After working on the base I tried doing some work on Annyssa.  Now, from this experience so far I have a couple of thoughts that I'd like to share.  If you are ever going to do this model, do yourself a favor, don't glue her to the mount.  I believe it is probably easier to deal with painting the model without the hassle of getting the paint brush into hard to reach places.  In fact, I am at a point where I am still considering somehow prying her off of it to finish it.


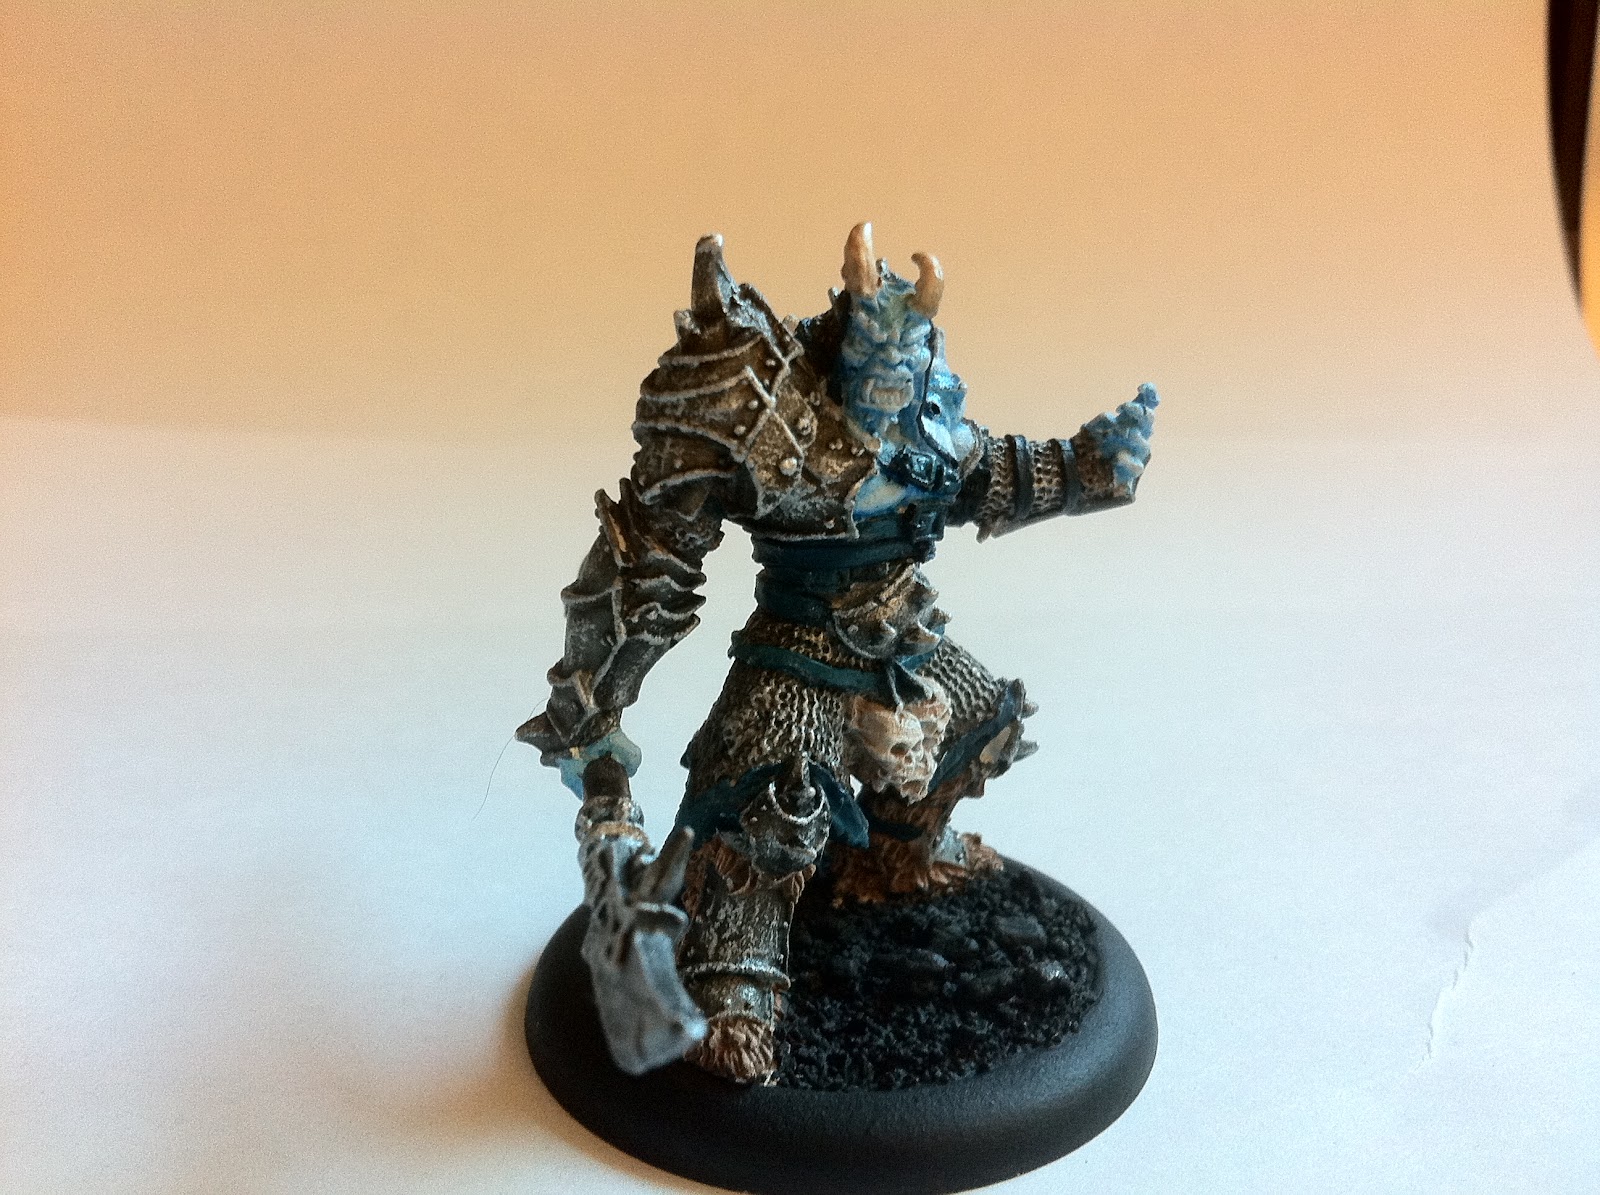
So far I've done her skin to my normal specs of Legion.  Base white > blue wash > dry brush icy blue.  I am very bad with faces and in fact will confess to having tried to get "fancy" with her face for practice sake and at the end I re did it as I mentioned above.  She looks a little more manly than I'd prefer but it will do "table top" quality for now.  I will probably do a little more with her hair so that it's much more distinguishable from her skin.


The horns of the mount got a simple Greyphone Sepia wash over the white base and I'm pretty happy with the results.  The metal covers (in fact all the metal) will get the treatment of Bolt Gun Metal > dry Badab Black wash > dry brush Silver.  If it wasn't for the forces book I couldn't tell you what parts of her bow are metal and which are wood or another material.  It looks like there's some room for interpretation if you wish but I'm just going to follow the pictures I have for reference (not sure she's actually in the forces book but maybe the PP site).


The leather on the mount covers is an attempt to recreate the color I made for my Ogrun here.  It's basically GW Scaly Green and a dark Blue mixed together.  Overall I like it.  It's quite subtle on her but I will most likely be washing it a tiny bit and then dry brushing or highlihgting in some fashion with a lighter color mix maybe adding some icy blue to it.


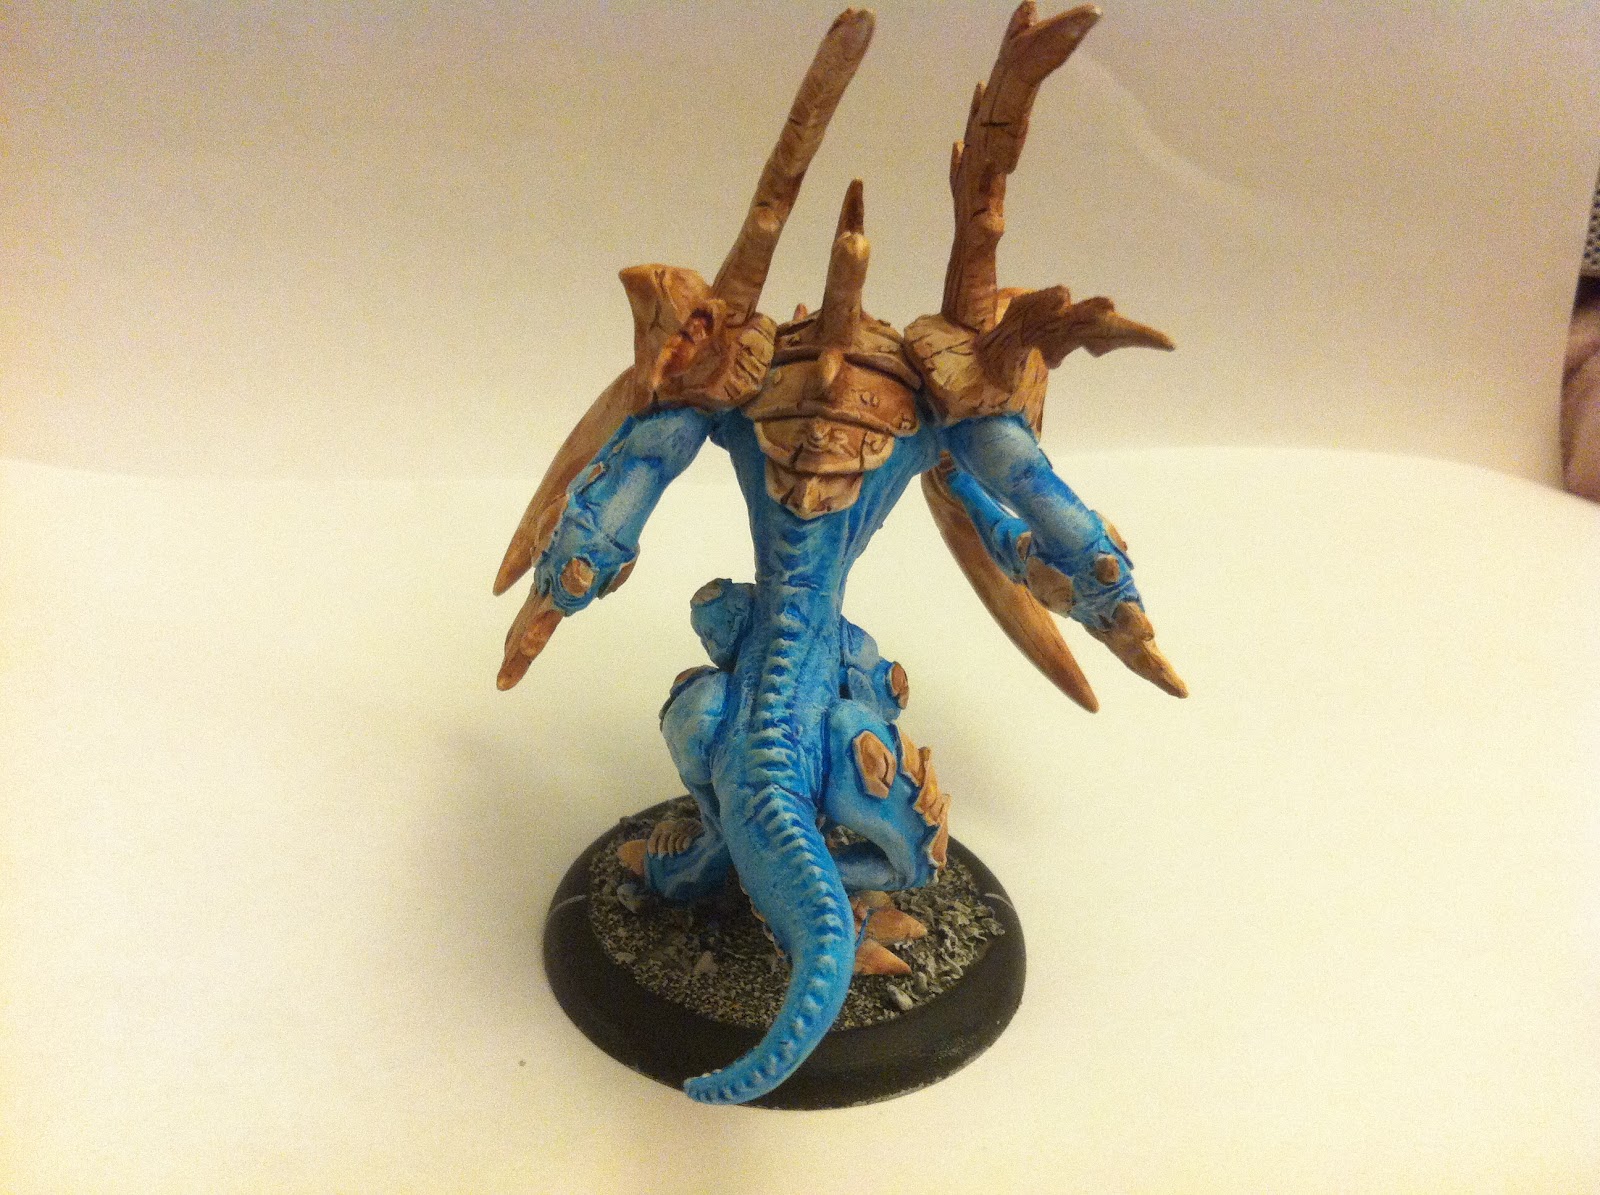
On the last picture I tried to capture the work on the mount's skin.  The picture doesn't do it much justice as I think it turned out pretty well.  The previous picture might be better.  It's really just a Light Grey > Wash Devlan Mud > dry brush Light Grey again.  I might do one more run of dry brush white.  I'm using the same technique on the hair of the mount and mouth.

Overall this model has served as a great learning experience but also a bit of frustration.  I'm hoping to press through and finish it and see if there are any other tricks I can gain off of this.  So far I still have to finish her equipment, armor, and the mount's hooves as well as the mount's bridle details.  I hope this has served as some inspiration!  If you have any tips for me let me know or your own Annyssa WIP article!  More to come...

Friday, October 28, 2011

Modeling/Basing: Annyssa Ryvaal WIP (2)

So as promised here's part 2 of the Annyssa Series.  I really wanted to do something with her base.  So first things first, I removed her.  A little wiggling and some tugging with tools got her off of the base successfully.


Now with the model off of the base I took some cork material and broke it up around the edges enough to do two things.  One, I broke it enough to fit on the base and cover enough of it so that it would look like a massive stone slab as well as minimize how much I'd end up flocking.  The cork material or sheet that I bought I simply bought at my local Walmart in the office supply section.


The fact that in Warmachine/Hordes the volume of your miniatures is predetermined by base size is something that I actually like quite a lot.  I feel like it gives you freedom to model up poses as well as high and wings and just embellishments on your figure in general without sacrificing tactical advantages in line of sight.  Because of this I chose to add another level to the rock.  I felt it looked good for her to be a top some rocky snowy (more on the snowy in other posts) mountain looking down on her prey.


The next step was very simple.  I just wanted to get a good sense on how much of the cork material I would have to dig out since I had chosen to use the bracket under one of the stag's hoof.  So I put her side by side around the area where I wanted her to end up and just marked it with a permanent marker.


After the mark I just started digging with a sculpting tool and an old exact knife.  During this process I would try to fit her in the gap to see my progress until I was satisfied it would fit the bracket.


I went ahead and put her on there to make sure it was a good fit.  At this point I wonder if this is what people do when basing this way.  What do people do to hold the figure in place when doing the base first?  Is this a method?  Hit me up on some comments and let me know!


My next step was based on a tiny bit of experience working with the cork material.  I took some white glue, watered it down about 30% and spread it all over the cork.  The reason for this is that in the past, the cork has actually been able to absorb quite a bit of the paint leaving patches that needed retouching several times.  It's not hard to touch these patches up but in truth it was simply annoying as sometimes it would absorb enough to have me repaint 3 or 4 times.  I also added the glue to hopefully  help the material not crumble and fall apart later in it's life from being handled in the gaming table.


After the glue dried I went on to flock the edges that were not covered by the cork.  I may do something else with the edges as far as maybe adding snow etc... but for now I'd rather flock it in case I don't get to it right away.


My next step will be to paint the base so that I don't have to deal with the model being on there while I experiment on how to get some good looking rock effect on here.  I will be addressing that on another WIP for her.  More to come...

Thursday, October 27, 2011

Modeling: Annyssa Ryvaal WIP (1)

I'm probably going to do a bit of a series on this model.  As you can see from the picture she has already been attached to the base.  I did this with just a tiny bit of superglue so that I could later remove her if I wanted to do something with it.  I believe I will!  For now though, this allows me to user her in games till I get her complete.


Putting this model together was not too hard.  I usually worry when pewter models come with the head detached (I'll address this on a pVayl post later).  This model however, was good, and the head fit properly only having to do a double take once or twice.  I believe the only hard time I may have had was with her bow arm taking a bit longer to dry than I wanted.  The gap filling looks to be minimal work at most.

Like I said before though looking at her on this base, there is no way I'll simply "flock" the bottom with rocks and be done.  I believe I'll try another cork material experiment on her.  I'll try to document it as I go.  More to come...

Wednesday, October 26, 2011

Modeling: Angelius WIP (1)

The Angelius!  This is actually one of the most awesome looking models I have ever seen.  To be honest I plan on using a model like this not just for Legion but maybe some D&D and Pathfinder games!  Any who, let's go over the basics.  I don't know if I'm lucky but this model didn't have much mould lines or flashing.  Whatever little there was took about 10 mins to remove, dremel out, and brass brush polish.


There were however, a couple of issues with the wings fitting without leaving a gap.  Don't get me wrong.  The wings fit right as far as surface area to glue and such but no matter how I positioned them there seemed to be a gap.  On the image below hopefully you can see though that the gaps were minimal enough to be taken care of by gap filler.


The largest gaps were actually left on the back of the beast.  To maximize the area attached to the body there seemed to be huge gaps left on their connection to the back.  This part was also easily taken care of by gap filler.  Because of their location I was able to hold the model just right for about 5 minutes so the glue wouldn't run off.


In the image below you can see the gaps being filled by the glue.  Although it may look like there's too much glue, up close and personal the glue is smoothed out to the shape of the model.  So, I'm pretty sure that after the primer goes on it'll be like it's all once piece.


I did very basic work on this models base.  I am going to probably leave it as is for now and get some more experience basing.  I believe this model will most likely be very easy to remove from the base and redo it when I come to that point.  Also, it is important to note that this model is actually quite stable even though it's got a lot of it's weight on the upper portion of it's large vertical area.  I found that feature comforting Well, modeling modeling modeling!  I'm in a frenzy!  I hope you are in a hobby frenzy as well!  More to come...

Tuesday, October 25, 2011

Modeling Tools: The Dremel

So on my first article about modeling tools I decided to do it on the Dremel.  I've mentioned it on a couple of posts recently so I figured I'd write this while it was fresh on my mind.  Personally I own the Dremel Stylus.  I purchased this baby back around 2008.  I remember liking the gun like shape as well as the fact that it has a lithium battery which means I don't have to drain the pack before charging it (less prone to battery memory issues) so anytime I am done with it I can put it right back in the charger (which I don't lol).


It is important to note that there are some downsides to having the Stylus, although you may already not like the shape and therefore there's no reason to worry if you acquire a "regular" dremel.  First of all, you cannot change the batteries as simply as other dremel models or exchange them or borrow them from friends etc...  I believe they can be replaced but they have to be bought special for this dremel model.  Secondly, there are some accessories for the dremel that turn it into other "tools" like a guide drill, push drill etc... (don't know the name of most).  Those accessories are based on the body shape of the dremel and none of them that I've seen fit this one.  So, be aware of that if you take a liking to the stylus.


When I first acquired the dremel I had already had some experience on what they were about as it relates to modeling thanks to a friend that used his to model as well.  So with that said, I was mainly interested in acquiring the Brash Brush (535), flat Diamond Point (7134), and round Diamond Point (7144).  


Below you can see the flat Diamond Point.  I use this one to deal with oval or flat surfaces.  Also, I use it to get into smaller places that the oval Diamond Point cannot get to (between arms and such).


Note on the image below the "oval" shape at the tip of this particular Diamond Point.  I use this point for areas that are concave as not to disturb the natural shape of the miniature.  It is also larger than the flat Diamond Point so it won't fit on as many places but it will feel more stable over larger surface areas.  Also, because of it's round tip it can also clean up flashing on perpendicular edges a little better than the flat bit, although at that point I would recommend using a file (I'll post on those in another article).


I have used the image below on the Iron Fang Pikeman post here but I figured it was applicable to this example so here it is again.  So what we have here is a generous mould line with some flashing coming out of it as well.  It is my preference to use a dremel Diamond Point for these.  I used the flat Diamond Point and filed it off.  You want to be careful with pressure and the speed you set it at.  Not sure how other dremels work but for the stylus at a setting of 2 it works fine for me.


After you're done with the Diamond Point the area will be "slightly" scratched looking.  This is where the Brass Brush comes in.  I usually use a higher speed setting for the brush, about 3 - 4 is good.  It is also important to note that the brush tends to shed it's bristles while it's being used.  Because of the speed it's going at there's a chance they will shoot out towards your face and eyes.  Wear safety googles!  Also, if you have pets I would do this in an area that you will be cleaning promptly (vacuum) or that they don't go to so they don't accidentally eat any brush bristles.


As you can hopefully see from the picture above there's no sign of the mould line or the flashing.  So why not a set of regular files or an Xacto knife?  Well the answer is I use those too on occasion.  It really depends on the task at hand.  I do find myself using the Diamond Point more often.  Also, I find the Brass Brush so useful that I use it in combination with the Xacto knife or files to smooth out any work perform to clean up the mini.  By the way the brass brush will also clean up botched up prime jobs but I'd recommend wearing a mask for that as the dust from the primer will fly everywhere.

Let's not forget of course that the dremel is in essence a drill.  Because of this you can buy all kinds of bits including drill bits to help you pin, sand, engrave etc...  Do any of you use a dremel for this?  Got better ideas?  Let me know what you think.  If not I hope this has served as a source of inspiration today for your modeling tools!  More to come...

Monday, October 24, 2011

Modeling: Iron Fang Pikeman WIP (1)

First, I'd like to apologize for the pictures.  Not that I'm a master photographer or anything but usually I at least have HD turned on so that more detail can be seen if necessary.  Anyways, onto the update...

As I mentioned here I acquired some Khador models.  This was during a bi-annual auction at one of my local game stores.  No, I'm not going to stop doing Legion but I did want to have a Warmachine faction as well so this is my first update on their progress as well.  Plus, there's a legion model right now slowing me waaaayyyyy down on updates.  I'll cover that sometime this week and it may be a project that I put on pause so that I don't slow down my progress so much.

Any-who, as with anything beggars can't be choosers and here's me working on a unit of Pikemen who came sort of "primed" in white.  I say sort off because it was a light coat, although it was kind of rough kind of like sand paper, however it was easily removable by brass brush and Dremel (technique also demonstrated at Spacejunky's Gaming and Hobby Blog a friend of mine on a prime job gone wrong).   This guy below actually still has the light coat on but it's probably hard to see from this crappy pic.


There! The picture below probably shows the "spraying" previously done to the fig a little better specially on the base.  Not a big deal, so now I set on to just make the dudes whole.  Their arms and such were all mixed up so it took me a tiny bit between pictures and such to organize who's stuff went where.


I then went onto clean up some of the paint that I thought would maybe cause me trouble when I went to prime it.  On the image below you can see the brass brush actually works quite well!


While doing some of the cleaning I ran into some mould lines.  This arm in particular was quite nasty.  I believe this is the "unit leader"... holy crud that's a big line of moulding.


Ah!  This picture shows off better the huge line of moulding that needed to be cleaned up.  Again, I actually used a Dremel for this with a diamond bit.  Not sure exactly what they are called since I threw away the packaging (I'll do a more in depth post on the technique later, which I actually learned from a buddy of mine who likes modeling as well) but it's basically a file.  They have two types one of them is just rounder than the other.  After "filing" with the Dremel I usually go over it with the brash brush attachment to smooth out the surface.


I did forget to take an "after" picture of the clean up before I glued it onto the mini but here's a closeup that hopefully shows the mould line virtually gone.


Another thing that I've decided is to keep their shields off.  I was going to glue them on there when I realized that painting them would be a lot more difficult with the shield covering quite a bit of the figure.  What I have done to keep them straight is simply put a number under the base of the figure and putting the same number on a blister pack containing the remaining portions of the model.  This way I don't have to figure out who's stuff who's more than once.


I have a little bit more work, some cleaning left here and there.  After that some basing probably which will be mainly simple flock since these guys take up a bit of room on their own base. 


Not too shabby for about 6 bucks at an auction eh?  So, there be a minimum Iron Fang Pikeman unit w/UA (Yes I know the standard is missing the star on the top... it's around here somewhere! Ah!  The numbered blister...  I hope... More to come...

Friday, October 21, 2011

Modeling: Strider Deathstalkers WIP (1)

These models are probably some of the easiest models to clean up and put together ever!  Everything pretty much fit as prescribed with no problems and there was very minimal to no flash and mould lines.  I got four of them for a couple of reasons.  I believe one of the tier lists in the legion book allow me to take 4 (eLylyth perhaps).  Also if you play any role playing games these guys fit very well as your own character if it's a rogue or a ranger as well as a set of NPCs.


I called this a WIP because after thinking about it (and actually simple basing 2 of them) I believe I want to elaborate their bases a bit more.  I will probably just try one of the two not currently based and see how that goes.  If it goes well I might consider "de basing" the two that are already simple based and do them up too.

Thursday, October 20, 2011

Painting: Warmonger WIP (1)

Here is a Warmonger about 75% done.  I probably won't be doing too many WIPs on him as I'm more than anything experimenting to see how I am going to approach these guys.


I've already not followed my own personal advice and did a lot of the model first before painting the base.  I'll have to be careful when I paint it as to not have to correct too many things on the model from paint spilling on to it from the base.  


I'm pretty happy with a lot of things so far.  The skin is going well, the leather being a combination of blue black and green is turning out just quite the way I thought it would, although the leather straps coming off of it's coif have really been a challenge since they are so thin.

I've brush the metal bolt gun base and dry brushed up to silver but I'm not sure I like how "powdery" it ends up looking.  I might try to "overbrush" over it so that I can still capture the highlighting without looking so rough.  The eyes I'm still not sure what to do...  I wanted some sort of "blight glow" and my first instict was white but it doesn't contrast well with the icy blue highlights on it's face so you can't actually see it well.  Oh well, I hope this serves as some inspiration to get painting!  More to come...


Wednesday, October 19, 2011

Modeling: Nephilim Bolt Thrower WIP (1)

Got this guy ready for table top play.  I will probably be doing up his base as he just has that looks that screams special treatment.  All in all the model did not have much moulding or flash to clean up.


The only thing I would say was a pain was the spike behind it's neck and the little wing nobs on his back. They had enough "deformities" to make it tricky to fit into their places.  He only has a little ledge under his front foot so I'm guessing doing up the base using cork will be pretty standard.  More to come...

Tuesday, October 18, 2011

Modeling: eThagrosh WIP (1)

So, I know I have been saying I'm in a "rush" mode to get a lot of my models table worthy as far as painting is concerned but another thing I decided more recently is that there's absolutely no reason to actually own a warcaster/warlock and not put them together so you can at least use them without having to proxy.  With that said, as well as the fact that when I had this bit of time it was pretty dark already I decided to model me up some eThag.

Flashing:  There was so little flashing in this model it literally took me about 30 seconds to go around all the pieces and file away.

Moulding:  Same as with flashing.  All in all it took me about 2 minutes to clean up this puppy then for a soapy water soak and brush.


Finishing this guy up took me about 1 hour.  He was heavy enough that I ended up using 2 part epoxy glue.  I'm not sure what the consensus is on the interwebz for using this stuff but I personally have had a good experience.  I am however in the market to try the gorilla superglue.  Just had a gaming buddy mention it to me specially a part where it supposedly has some "give" so that bumps and such don't simply destroy the brittle connection of normal glue.


I took a couple of pics here one with flash one without just to give a good sense of the model.  I glued him to the base with a couple of dots of superglue as this guy is very likely getting some base work rather than just standard flocking.  However, I glued him because it is likely that it'll be awhile before I get to that and I may just want to play with him a few times before then.  More to come...


Monday, October 17, 2011

Painting: Scythean (Finished)

As I said on my list WIP for this big beast all the white parts that got "dirty" have been retouched with white.  They are now ready to recieve the glory of Gryphonne Sepia!


I took a medium size brush and pretty much applied it generously to most parts that are "armor".  This pretty much wraps this guy up to table top quality.  For higher than table top I will be looking into bringing at least another highlight layer to the "armor" with a mix of Bone White and White and also bringing that blue another layer of highlighting.  However, this is good enough to play for me.  More to come...


Friday, October 14, 2011

Painting: Scythean WIP (5)

Alright here we are on step 5 of the step by step for the Scythean.  In this particular step I will be basically cleaning up the areas that I would like to have stayed white so that in the next step the greyphon sepia shades it correctly.


Don't let the small amount of pictures fool you.  In truth, this was the most time consuming step, and usually is for my heavy beasts.  The wash as well as the dry brushing have a tendency to sneak into the smallest portions of the model constantly, making this clean up kind of a pain.  Now that the pieces that need to be white are there onto finishing the model!  More to come...


Thursday, October 13, 2011

Painting: Scythean WIP (4)

So, here we are in step 4.  What I do now is take the main / highlight color and basically dry brush it on the flesh parts of the beast.  I do start by what I call over brushing which is just dry brushing with the brush slightly more saturated than it would be for dry brush. [dry brush main highlight / main color]


I try to make sure I get all the obvious raised areas like the spine and the leg, and arm muscles, as well as ripples throughout the arm.  There are times when the brush is simply too saturated for my liking and that's ok, one of the things I like about this hobby is that to me there is almost nothing you can't come back from.  You could either repaint white then rewash or simply rewash an area that has "too much" highlight to bring it back down.


After I get done with the over brushing I do quite a bit of dry brushing just to make sure the figure isn't just flat out too dark in contrast with the raised areas.  Again, you could go overboard but you could just rewash if you did.


There are times in this process that I break out into a little bit of feathering and wet blending simply because the areas covered by the dry brush or over brush are too distinct and I want a more seamless transition.  I will be continuing on the step by step but I may actually return to this guy to accomplish more on the highlighting, I really just wanted to concentrate on table top worthy for now.  More to come...